Snapshot Tool
No need to take a screenshot – use the Snapshot tool to capture a chosen frame along with helpful information.
The Snapshot tool is perfect for saving and sharing any observations that you’ve made. They can even include any annotations and measurements that you’ve created, for extra clarity when sharing data with your team members.
Creating a Snapshot
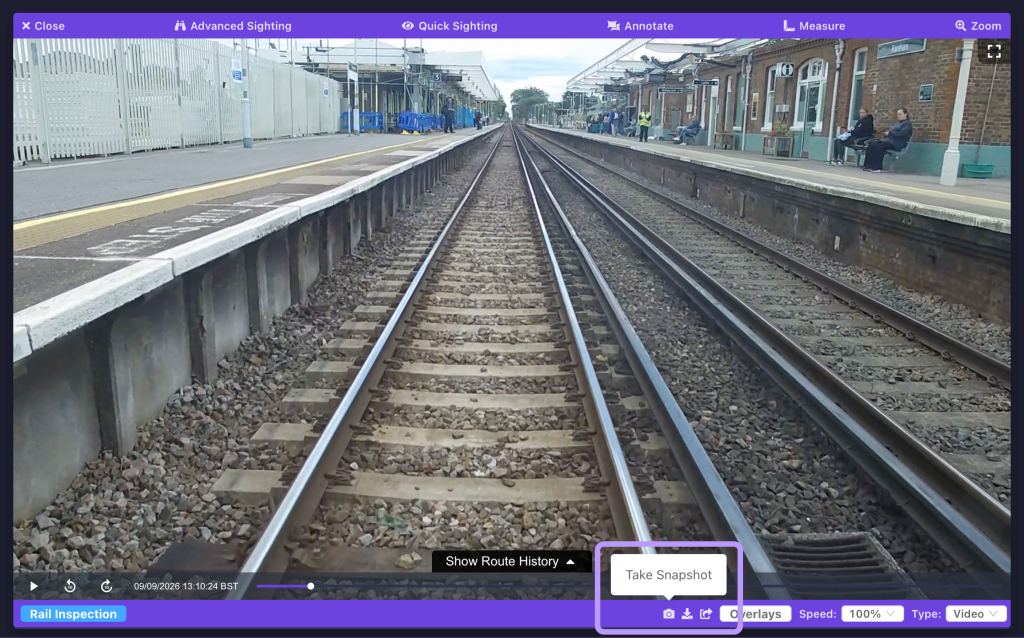
The Take Snapshot button can be found at the bottom of the video player panel. Click the button to begin creating a snapshot of the current video frame.
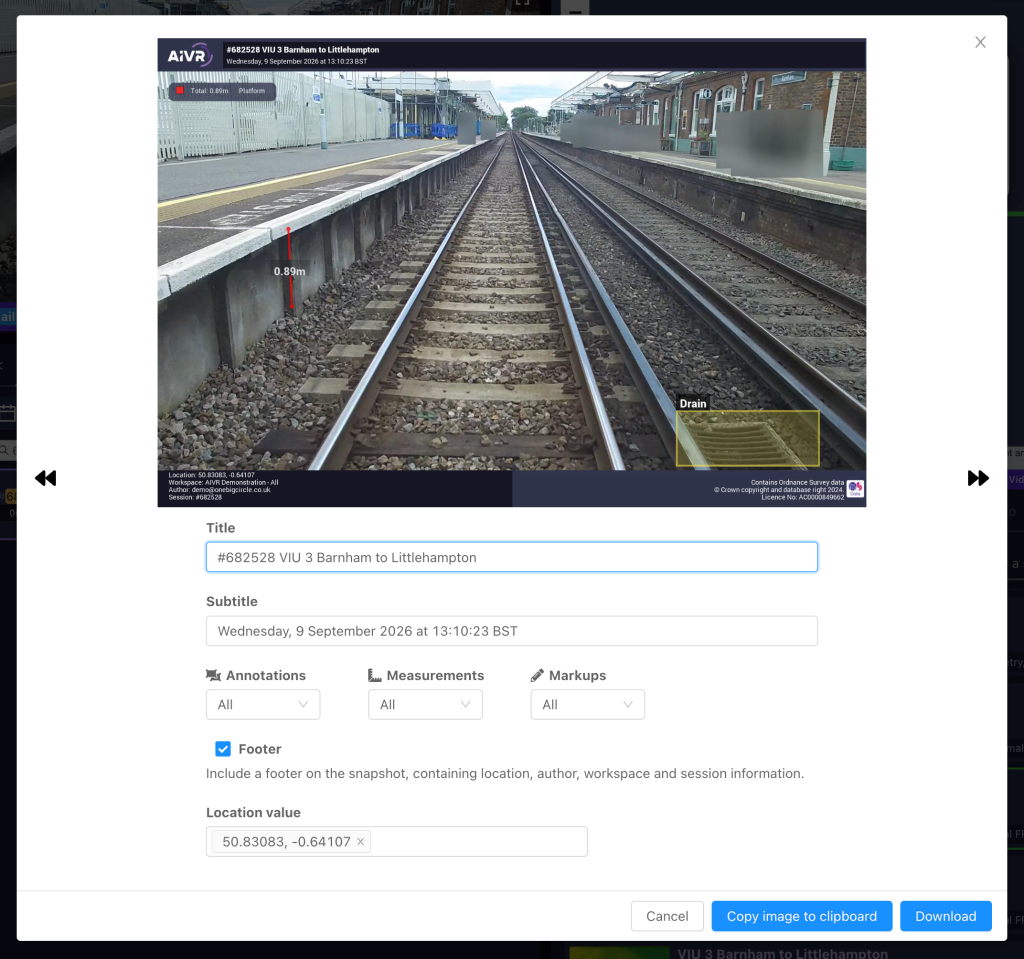
A preview of your snapshot file will be displayed in the window that appears. There are then several fields on the snapshot that can be customised:
- Title – This will be displayed in the header of the snapshot. By default, the title will be the name of the session that you are viewing.
- Subtitle – Displayed beneath the title in the header. By default, this will be the capture date and time of the session footage currently being viewed.
- Annotations, Measurements and Markups – Select whether you would like the corresponding overlays to be visible in the exported snapshot. For each of these, you can select whether to show your own markings, markings made by anyone in your workspace, or none.
- Footer – Choose whether to include a footer with additional info at the bottom of the snapshot. This will include the snapshot location, the name of the workspace, your account email address and the session ID.
- Location value – Choose the coordinate format for the snapshot location included in the footer.
You can then choose whether to copy the snapshot to your clipboard, which will allow you to paste it into a document or message, or to download the snapshot to your computer as a PNG image file. Snapshots are exported at the original resolution of the session footage, meaning that no image quality is lost.
Video Tutorial
If you have any questions at all please contact us by emailing support@onebigcircle.co.uk